Learn
Dec 9, 2024
Whether you’re brand new to XR or it’s not your first rodeo, this guide is designed to get you up and running in Campfire as quickly as possible. No muss, no fuss, no fluff.
Each section covers key points as you walk through the following 5 steps:
Get the app
Add your first model
Use desktop and Quest together
Change the presenter
Share with a collaborator
Sounds like fun, right? Let’s dive in.
PS: For a condensed version of the step-by-step directions found in this guide, use the Campfire Quick Start Checklist.
Step 1: Get the app
One account, multiple devices
Campfire brings all the attributes of modern enterprise SaaS to XR and 3D collaboration. That means your Campfire account works the same way as many apps you already use:
You sign up for an account using your email address
Your login information is the same across all devices
Any changes you make are updated in real-time across all versions of the app
Once you have your account, you can login on Quest, PC, Mac, or iPad.
Your Campfire account lets you log into more than one device at the same time, as long as they’re different devices. For example: you can use the same account to log into both Quest and Mac simultaneously, but not two Quests or two Macs.
No matter what device you’re using, the interface is consistent and familiar across platforms. You can effortlessly switch between desktop and headset without needing to leave your desk. When people join the same project from different devices, they’re always in the same session together.
It’s all designed to feel seamless as you work and collaborate across devices — so you can easily use the right device, for the right task, at the right moment.
To complete step 1: create your Campfire account, install the app across your devices, and login on desktop and Quest.
On a web browser:
1.1. Sign up for a free account if needed
1.2. Download and install the desktop app, then login on your PC or Mac
On Quest:
1.3. Install the Quest app, then login using the same account
Step 2: Add your first model
Like PowerPoint, but for 3D CAD
Working with 3D content in Campfire is as easy as working with pictures and text in PowerPoint.
You can drop native CAD files directly into Campfire, arrange them however you want — even copy-and-paste them. It’s sophisticated enough for engineers, yet simple enough for non-CAD users. Whether you're getting quick, ad-hoc feedback or prepping detailed review materials, Campfire makes it easy to communicate 3D information more effectively and efficiently.
But don’t take our word for it. It’s time to try it for yourself!
First, some key points about projects, scenes, file formats, and Campfire’s pricing plans:
Everything in Campfire is organized into projects, and each project contains scenes
Scenes are similar to slides in PowerPoint, except they’re built for 3D content
Each scene can contain one or more model, and you can bring multiple 3D formats together in the same scene (like a model and a scan, or different types of native CAD)
The Starter plan lets you create up to 5 projects with up to 5 scenes each, while the Enterprise plan offers unlimited projects and scenes
With a Starter plan, you can add files up to 25 MB in 11 formats
With an Enterprise plan, there’s no limit on file size and you can add 40+ different 3D formats — including native CAD from major CAD tools like CATIA, Creo, and SolidWorks
Okay. Now that’s out of the way, ready to add your first model to Campfire?
To complete step 2: add a model, duplicate a scene, apply a CAD color, and leave a comment.
On desktop:
2.1. If you need to borrow a 3D file for this step, download this Apollo 11 gearbox model (made available by the Smithsonian under the Creative Commons Zero license)
2.2. Open the app and click New Project
2.3. In the top-left corner, click the folder icon and select the file you want to add; when it's done processing, you’ll see the model appear in the middle of the screen
2.4. Above the scene list, click the duplicate icon to create a copy of the scene
2.5. Using the inspector panel on the right-hand side of the screen, switch to the Materials tab
2.6. Click CAD colors, then choose a color and drag-and-drop it onto any part
2.7. In the bottom-right corner, select the comment icon from the toolbar
2.8. Click on any part and leave a comment; press enter when you’re done typing
And that’s it!
You brought in a model, duplicated a scene to create another copy of it, changed the color of a part, and left a comment attached directly to the model. Didn’t take long, did it?
To go deeper into Campfire’s composing tools, check out these related support articles: Compose Scenes, Animations & Scene Transitions, Editing Material Properties, and Adding Scene Backgrounds.
Step 3: Use desktop and Quest together
Gathering around the Campfire
Now that you’ve added your first model from the desktop app, it's time to check it out in XR!
In this step, you’re going to join the same project on both devices at the same time — letting you see for yourself how Campfire works when you’re collaborating with others.
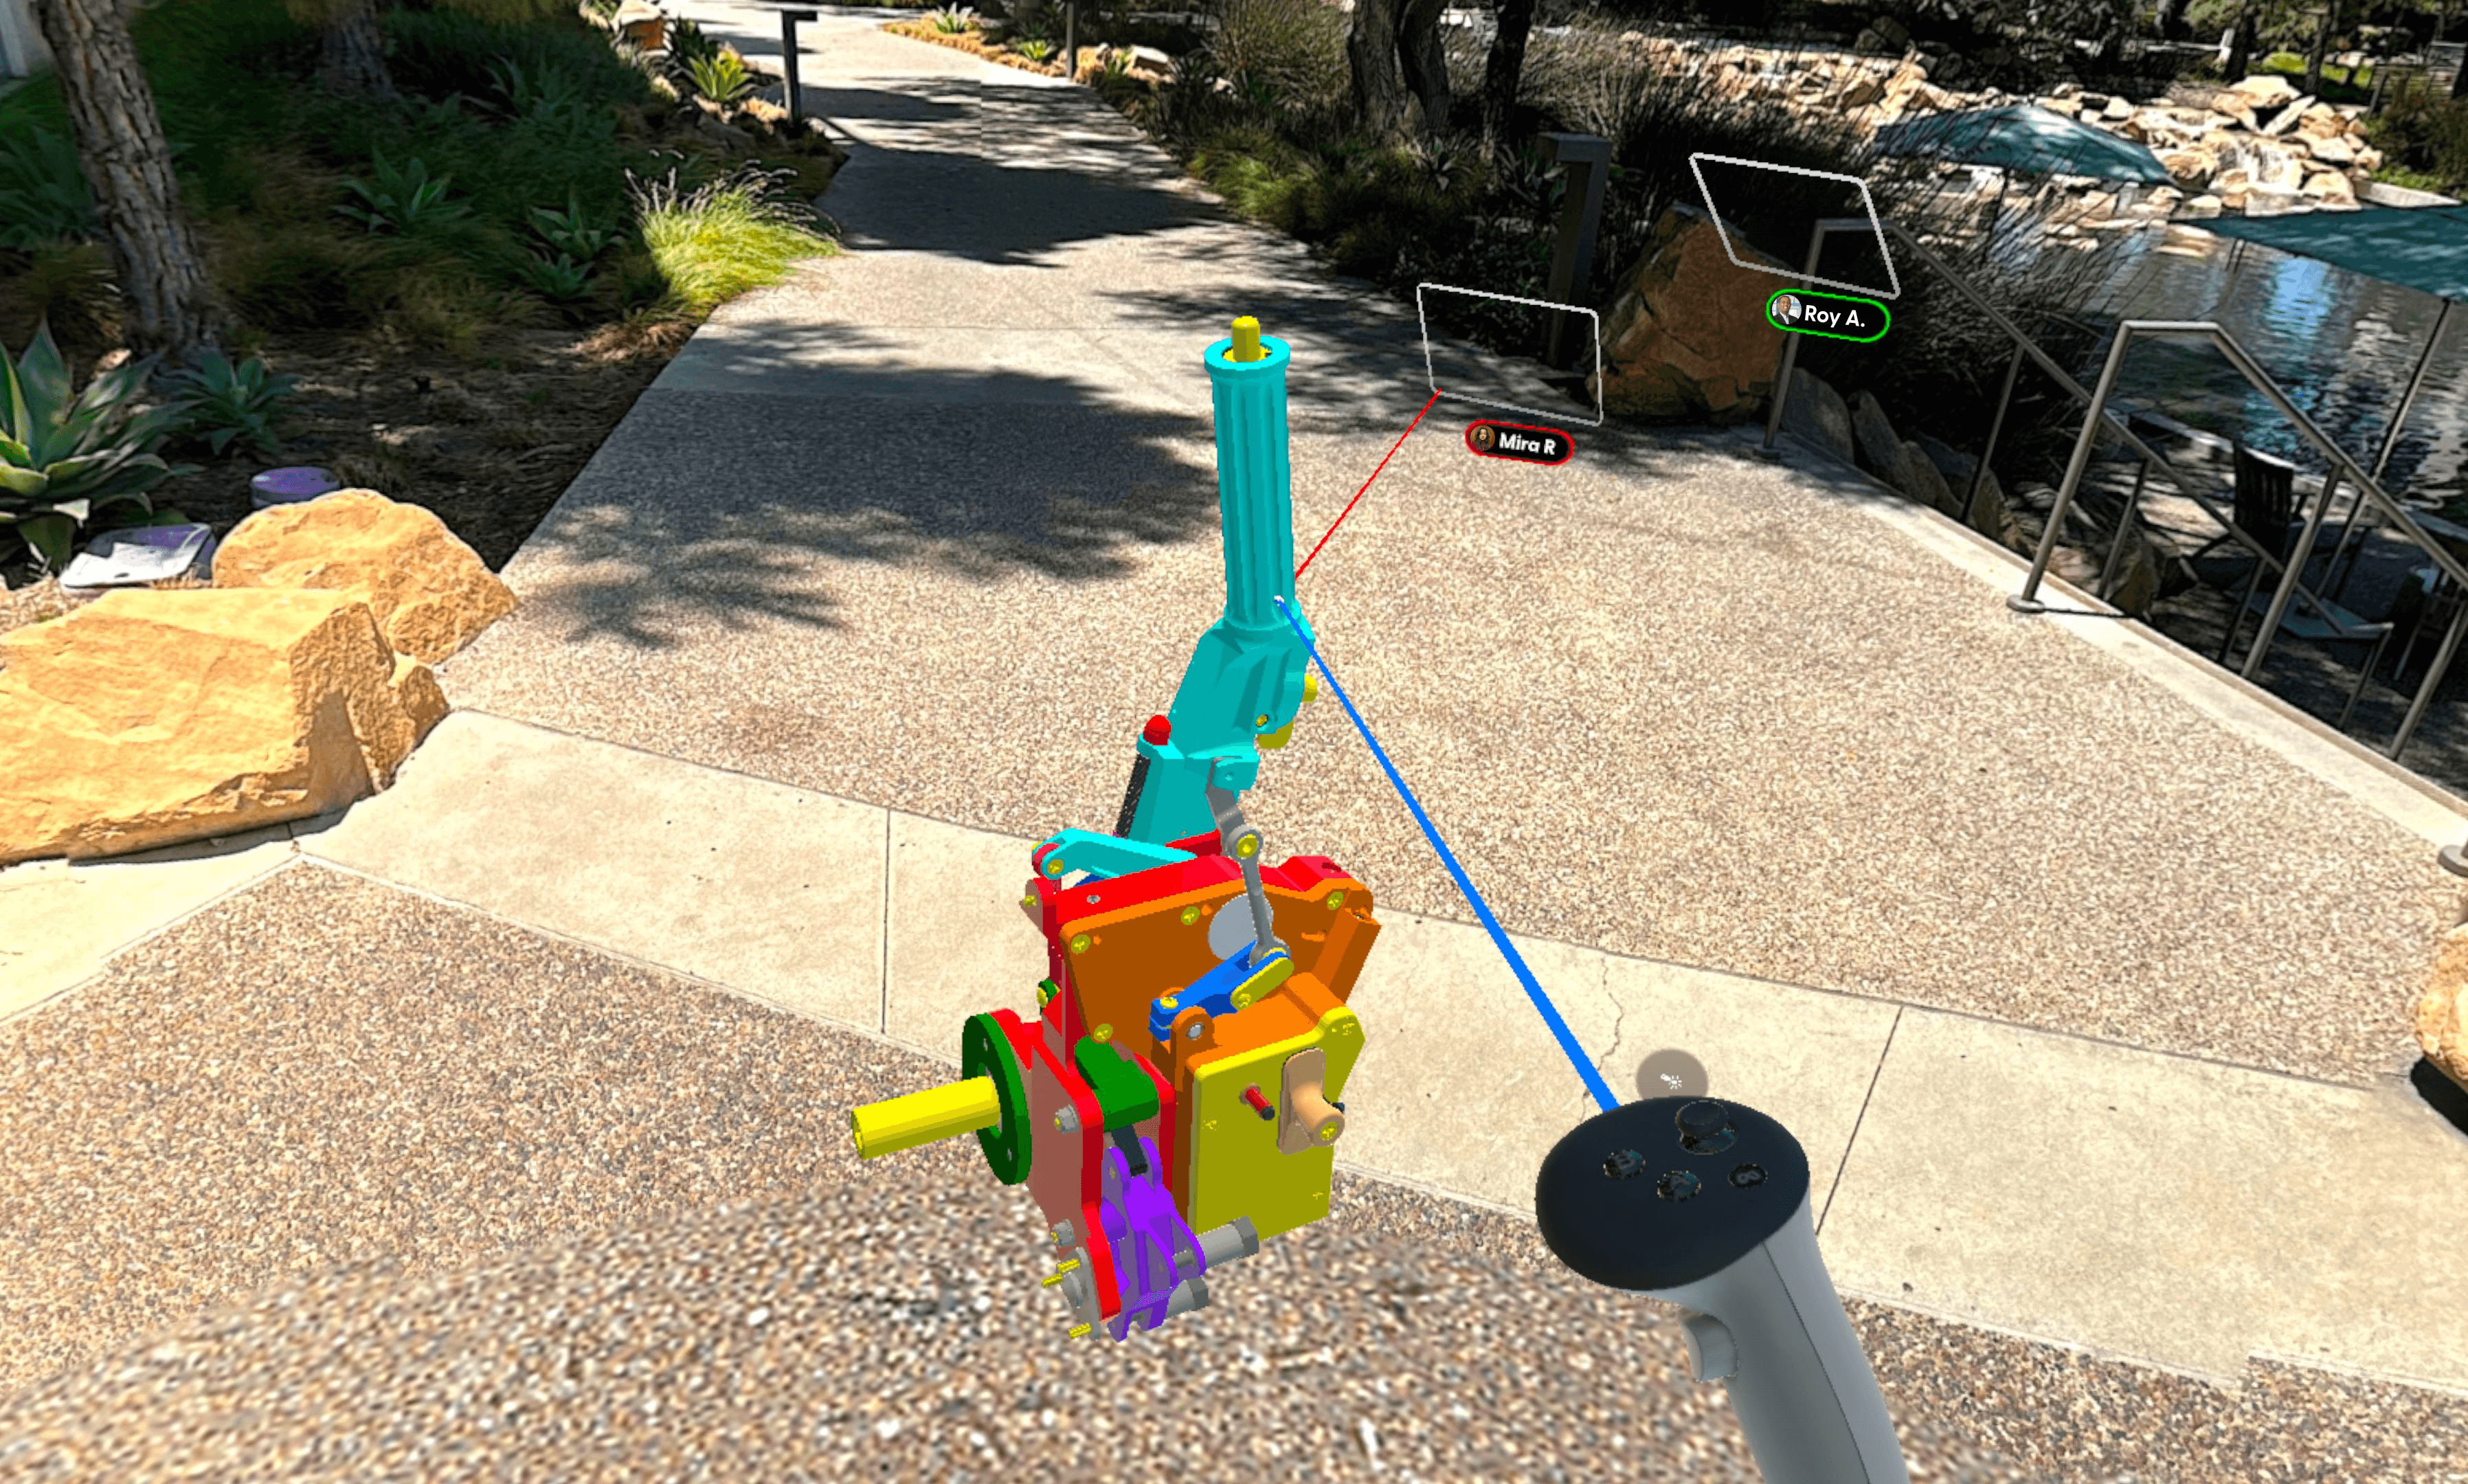
Once you join the project on Quest, you’ll notice that the model is automatically right in front of you. That’s because Campfire places everyone so that you’re always gathered in a circle around the scene content. (Around the Campfire, if you will.)
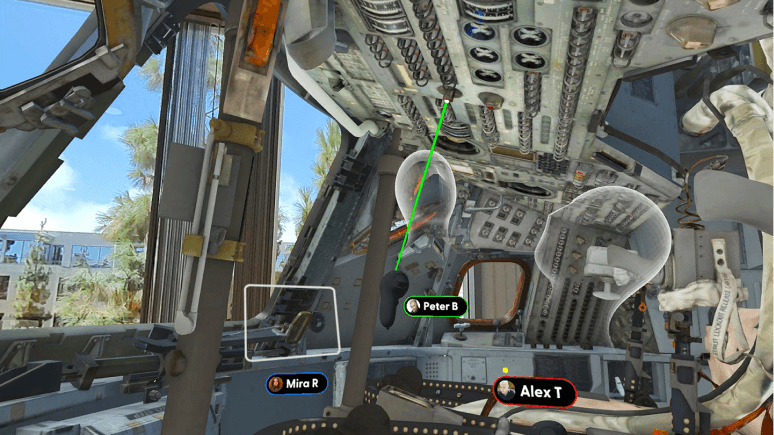
Whenever you join a project, you’ll see other active users in two places:
In the top right-hand corner, you’ll see their icon in a circle
In the center, you’ll see them represented as an avatar, wherever they are in the scene
There are two types of avatars in Campfire: floating heads and floating rectangles. Floating heads represent users wearing a headset, while floating rectangles represent flat-screen users (ie: anyone using a desktop computer or iPad).
Let’s play around with it!
To complete step 3: join a project on both desktop and Quest, switch back and forth between devices, and shoot the laser pointer.
On desktop:
3.1. Keep the project from Step 2 open on your computer
On Quest:
3.2. Join the same project from your headset
3.3. Locate the floating rectangle that represents your desktop user
Switching between desktop and Quest:
3.4. On desktop: locate the floating head that represents your Quest user
3.5. On Quest: move around and view the model from different angles
3.6. On desktop: notice how the floating head matches your movements on Quest
3.7. On desktop: select the laser pointer from your toolbar in the bottom-right corner, then choose any part and shoot the laser at it
3.8. On Quest: locate the floating rectangle and find the part it’s pointing at with the laser (you'll need to click the desktop mouse while viewing the model in Quest at the same time)
Ta-da! Even if you’re viewing the model from completely different angles on desktop and Quest, you’ll see exactly where the laser is pointing — making it easy to instantly and unmistakably clarify what you’re talking about.

Step 4: Change the presenter
Presenter status and collaboration tools
In the top right-hand corner of the screen, you’ll notice that one of your icons has a yellow dot above it.
The yellow dot is an indicator for an important concept in Campfire: presenter status.
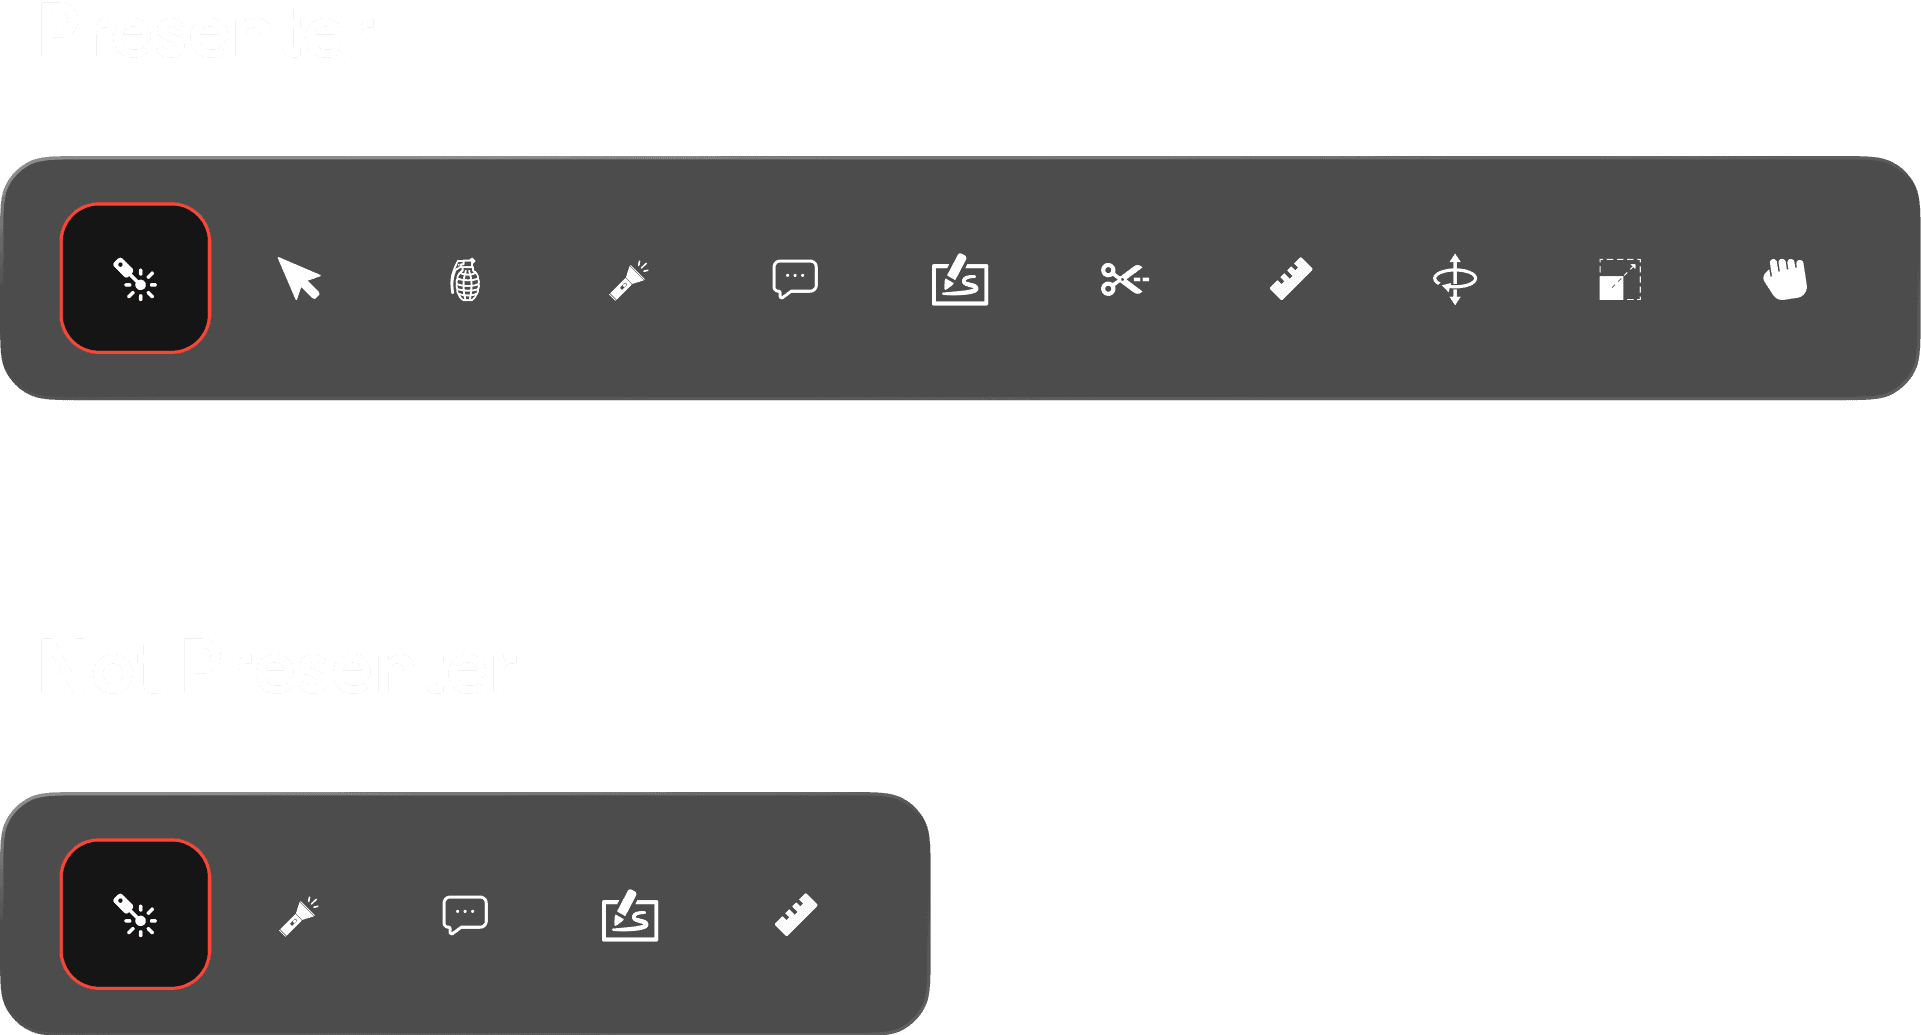
Only one user can hold presenter status at a time. The presenter has sole control over certain actions and tools, so that collaboration can flow smoothly.
Only the presenter can:
Change scenes
Control the position and size of models using the move, rotate, or scale tools
Apply materials or colors from the materials library and edit material properties
Explode models
Slice models and parts to see a cross-section
Use the grab tool to take parts off a model and move them anywhere in the scene
When you’re viewing a project by yourself, you’re automatically the presenter. As soon as multiple users are active in the same project, there can only be one presenter at a time — but it’s easy to hand off presenter status to any person, at any time, as often as you like.
Let’s try it.
Since you first joined the project on desktop, the yellow dot should be above the icon for your desktop user.
To complete step 4: give presenter status to a different user and explode a model.
On desktop:
4.1. Identify the presenter by locating the icon in the top-right corner that has a yellow dot indicator above it (this should be the desktop user)
4.2. Click on the icon without the yellow dot indicator and select Make presenter
4.3. Notice how the toolbar in the bottom-right corner changes when the desktop user is no longer the presenter
On Quest:
4.4. Press and hold the B button on your controller to bring up the toolbar
4.5. Hover over the grenade icon and release B to select the explode tool
4.6. Move the joystick forward and backward to explode and un-explode the model
Fun, right?

Step 5: Share with a collaborator
Secure sharing and permission roles
You’ve mastered the basics of composing scenes. You understand how collaboration works. Now it’s time to get others involved.
By default and by design, new projects aren’t shared with anyone at first. A project is only shared with others when you intentionally add them to that project. That way it’s always crystal clear what’s being shared, and with whom.
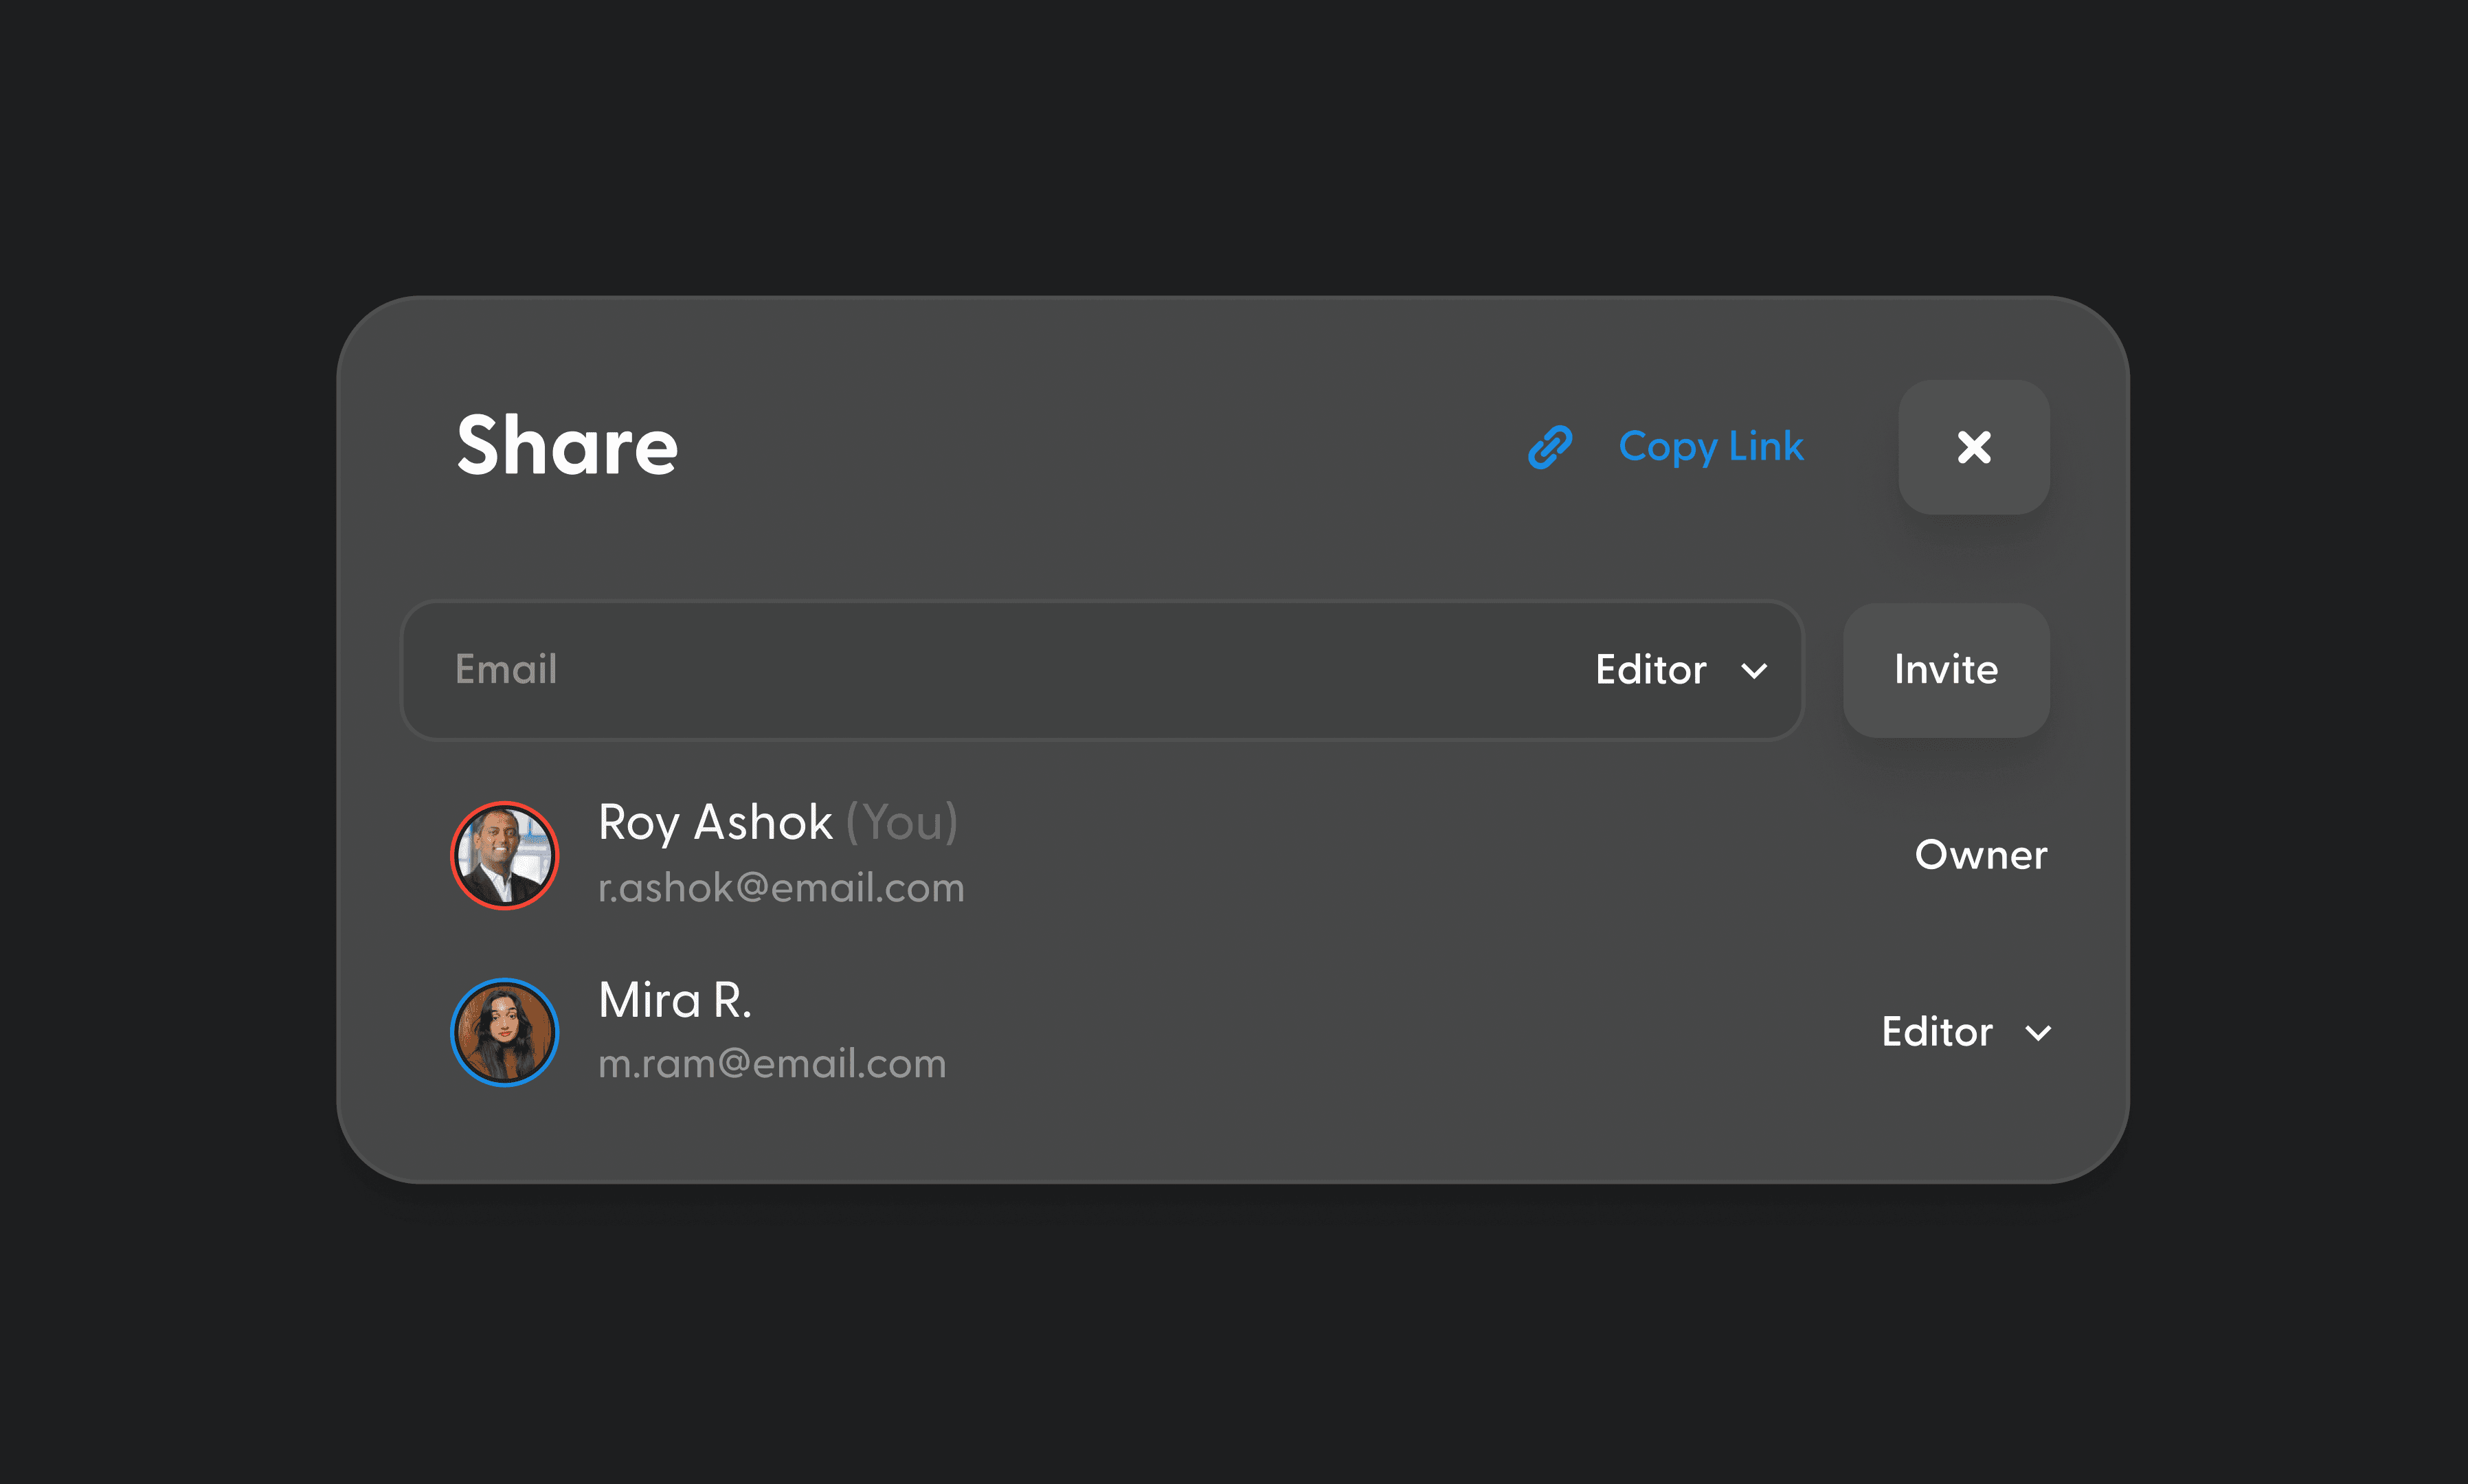
Campfire uses role-based permissions for simple, secure sharing. The four permission roles are:
Owner — The project creator who can view, share, compose, and manage the project
Editor — An invited user who can view, share, and compose
Commenter — An invited user who can view the project and create annotations
Viewer — An invited user with view-only access to the project
With a Starter plan, you can share with up to 5 collaborators. Enterprise plans can share with an unlimited number of collaborators, while giving you additional controls to manage users and sharing. With an Enterprise plan, admins can manage sharing at the organization level. For instance, sharing can be restricted to only allow sharing within the organization, or with specific trusted domains.
At anytime, you can change someone's permission role or revoke their access entirely.
Ready to get others into Campfire with you?
To complete step 5: invite someone to Campfire using their email address and assign sharing permissions.
On desktop:
5.1. Click the share button in the top right corner of the project you want to share
5.2. Enter the email address of the person you’re sharing with
5.3. Select their permission role, depending on the level of access you want them to have

Next steps
This guide gives you a solid foundation for getting started in Campfire. You can find more information by browsing or searching our Support Center.
A few final tips:
Start small — Don't expect to expose your entire team overnight; choose a few key people to share with, focus on getting them up to speed, then expand from there
Pick a strategic starting point — Where can you see the biggest and fastest savings? What processes are the most painful today? Who is most open to new tech?
Share your wins — Leverage internal channels to communicate early successes, whether that’s a quick informal message in a company-wide space or a more polished presentation to key stakeholders
And remember: the Campfire team is always here to help, so don’t hesitate to reach out.
You can email support@campfire3d.com anytime, or fill out a demo form to discuss our Enterprise plan.
